WooCommerce has become a popular e-commerce platform for many entrepreneurs and businesses as it offers a wide range of features and functionalities for creating an online store. In this article, we will explain what WooCommerce is, its uses, how much WooCommerce costs, and the steps on how to use WooCommerce in WordPress.
What is WooCommerce
WooCommerce is an open-source plugin built especially for WordPress, which means users can seamlessly integrate it with their existing WordPress websites. It has features for management, inventory tracking, payment processing, shipping options, analytics and reporting, and other customizable features that make it a versatile solution for your e-commerce needs.
How Much Does WooCommerce Cost
The core of the WooCommerce plugin is free to use. However, you will have to pay for additional extensions to access specific features or functionalities that your store might need. They can include website themes, shipping and delivery, payment gateways, marketing, and other extensions and themes that can enhance your store’s appearance and functionalities.
The costs of extensions can range from free to more than $100 per year. WooCommerce also offers subscription-based plans with pricing structures that are tailored to a store's size and needs. You can go to the Extensions Store to see a full list of WooCommerce's extensions and plugins, and the pricing range for them.
How to Create a WordPress Account and Install WooCommerce
Creating a WordPress Account
You should have a WordPress account to use WooCommerce. If you don’t have one yet, you can create an account by doing these steps:
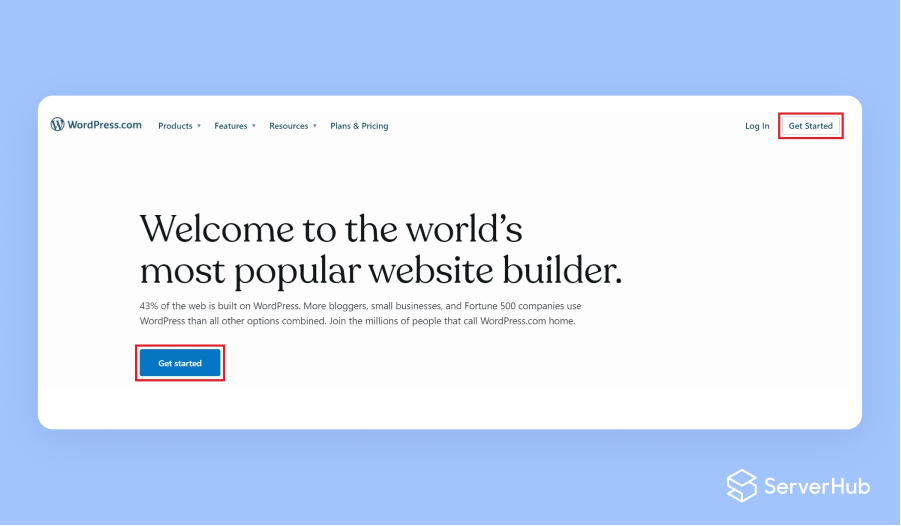
1. Go to the office WordPress website. Click on the Get Started button.
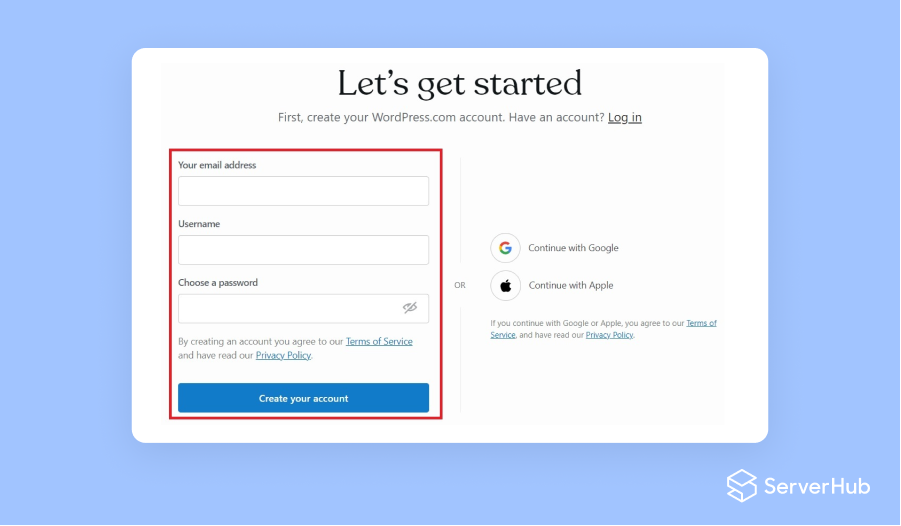
2. Fill up the details on the Let’s get started page. Then click on the Create your account button.
3. In the Choose a Domain page, enter some descriptive keywords inside the text field. A list of site names and domain names recommended by WordPress will then appear below the text field. From this list, you can select a free WordPress.com subdomain or buy a custom domain name.

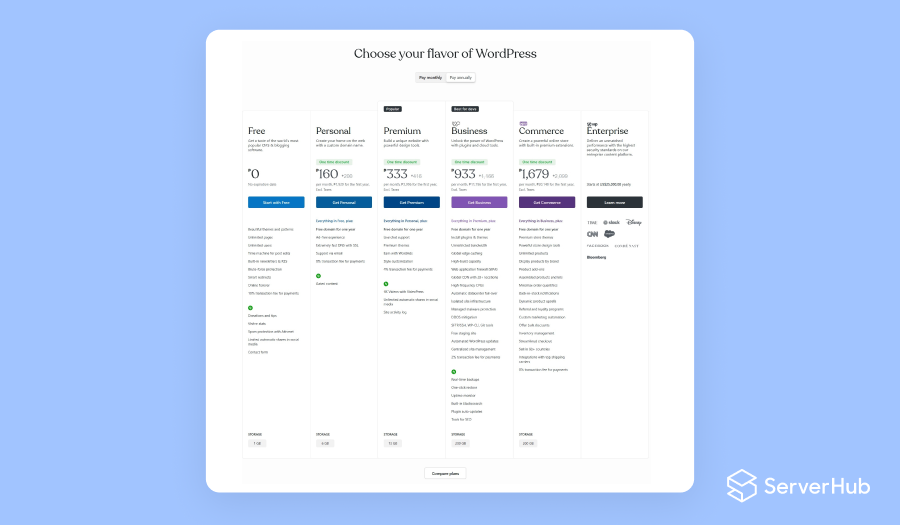
4. On the WordPress plans page, you can select Pay Monthly or Pay Annually. Then choose if you want a Free plan or any of the Paid Subscription plans on the page.
5. After choosing a specific plan, follow the remaining instructions to set up your account.
6. After setting up your account, you can start building your WordPress site. For a comprehensive guide on how to build your site, go to the WordPress' Build Your Website in Five Steps tutorial page.
Installing WooCommerce Plugin in Your WordPress Site
When your WordPress site is ready, you can install WooCommerce by doing the following steps:
1. Go to the WordPress dashboard. Click on Plugins.
2. In the Plugins page, type WooCommerce in the text field. Then press Enter on the keyboard.
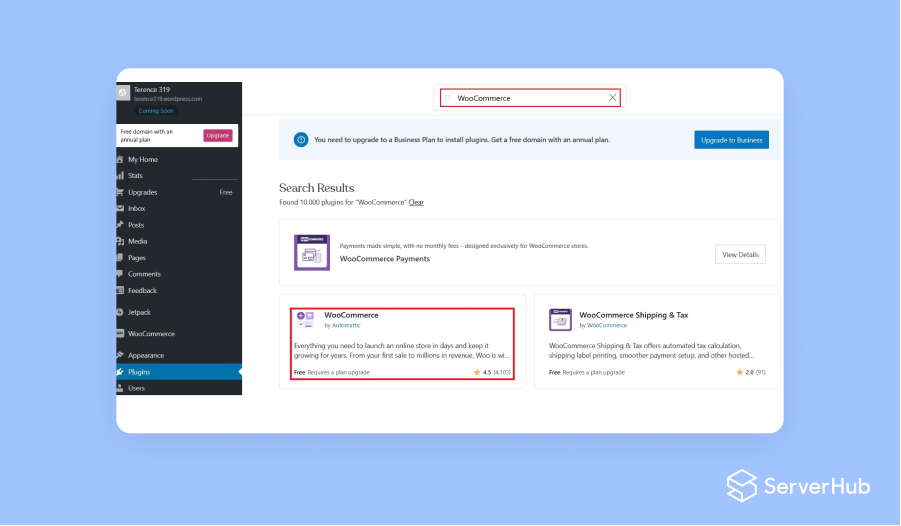
3. In the search results, click on WooCommerce. Follow the setup wizard to install and activate WooCommerce.
4. After WooCommerce is activated, follow the setup wizard to configure important settings for your online store. You can set up settings such as payment gateways, shipping options, tax rates, email notifications, etc.
How to Use WooCommerce
To set up the important features of your online store, follow these steps:
Add Products
1. To add products to your online store, go to the WordPress dashboard. Click on Products on the left-hand menu. Click on Add New.
2. Click on Publish to post the product and its details on your online store.
Manage Orders
1. To view the orders placed on your online store, go to the WordPress dashboard. Click on WooCommerce on the left-hand menu. Click on Orders.
2. The WooCommerce order management system enables you to view, process, and track customer orders, update order statuses, manage refunds, and contact customers about their purchases, and other related activities.
Customize Your Store
1. To customize the appearance of your online store, go to the WordPress dashboard. Click on Appearance on the left-hand menu. Select Customize.
2. The customization feature allows you to personalize your store's theme, logo, colors, fonts, layout, menus, and other appearance settings.
Analyze Store Performance
WooCommerce has built-in reporting and analytics tools or extensions for evaluating your store's performance. You can use these tools to identify popular products, monitor customer behavior, track orders, revenues and income, and generate other analytical and reporting data that will help you to make data-driven decisions for your online store. To see a full list of WooCommerce's analytics and reporting extensions, go to the Reporting and Analytics page under the Extensions Store.