
PrestaShop is an open-source e-commerce platform that allows users to create and manage their online stores. In this article, we'll discuss what are the major features of PrestaShop, and the procedures on how to install and use in on Windows.
Features of PrestaShop
PrestaShop is a versatile e-commerce platform that is fully compatible with the Windows operating system. It provides a wide range of functionalities to help you build your online store and customize it to suit your specific needs. Some of the major features of PrestaShop for Windows:
- User-friendly – A visually appealing and intuitive storefront, allowing businesses to showcase their products attractively. It supports multiple currencies and languages to enable merchants to target a global audience and markets.
- Product management – You can easily add, edit and categorize your products and set their attributes, and efficiently control stock levels.
- Payment and shipping options – Supports a wide variety of payment gateways and shipping carriers, giving customers the freedom to select their preferred payment and delivery methods.
- Customization and themes – A vast collection of themes and templates, allowing users to customize their online stores to match their brand identity.
- Analytics and reporting – Merchants can track their store’s performance through built-in analytics and reporting tools. These tools can help optimize sales and marketing strategies.
- SEO-friendly – This makes it easier for your store to rank higher in search engine results and attract more organic traffic.
How to Download and Install PrestaShop on Windows
Downloading PrestaShop
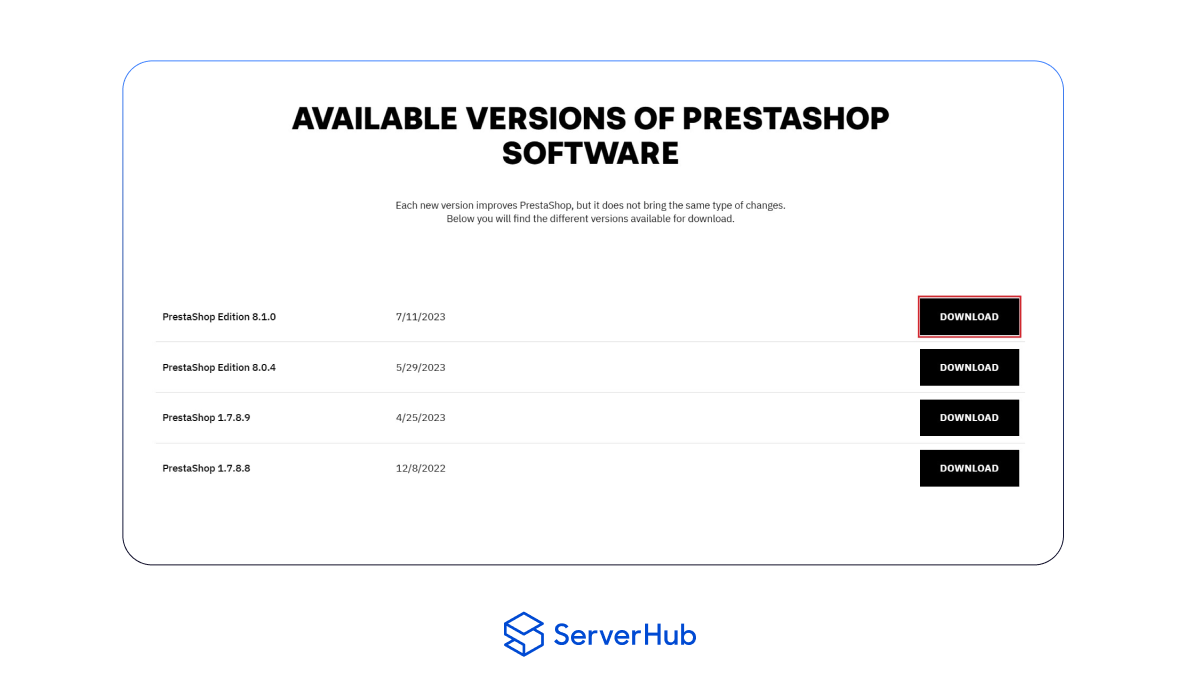
1. Go to PrestaShop’s official download page at https://prestashop.com/versions/.
2. In the Available Versions page, select the updated PrestaShop version to download. The recently updated version is PrestaShop Edition 8.1.0. Click on the Download button.
 3. You will be redirected to the Download PrestaShop Edition Basic page. On this page, enter your e-mail address in the Email text box. In the Profile field, click to select an option (Agency, Freelance, Merchant, Technology partner) from the dropdown menu.
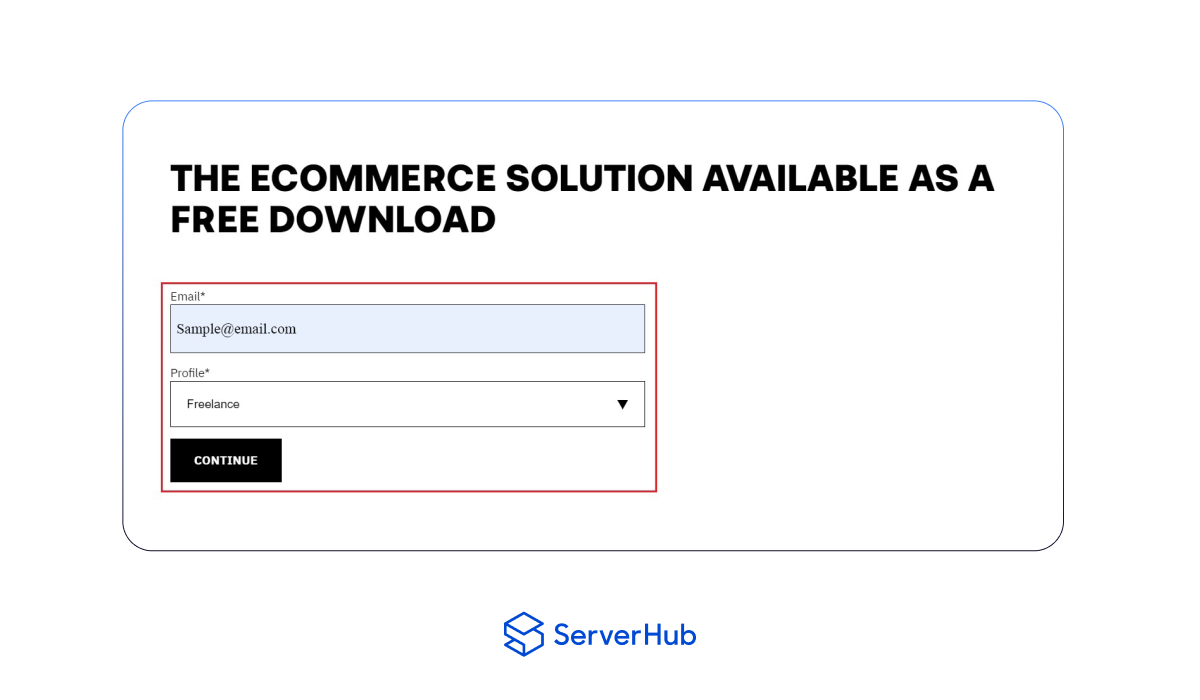 4. Click on the Continue button to download the software in ZIP format.
Extracting the Files
1. After the software is downloaded, extract the files from the ZIP folder to a location on your computer
2. You can use a file extractor such as WinRAR or 7-Zip to extract the files from the ZIP folder.
3. Transfer the installation files to your preferred directory folder.
Installing a Local Web Server Environment
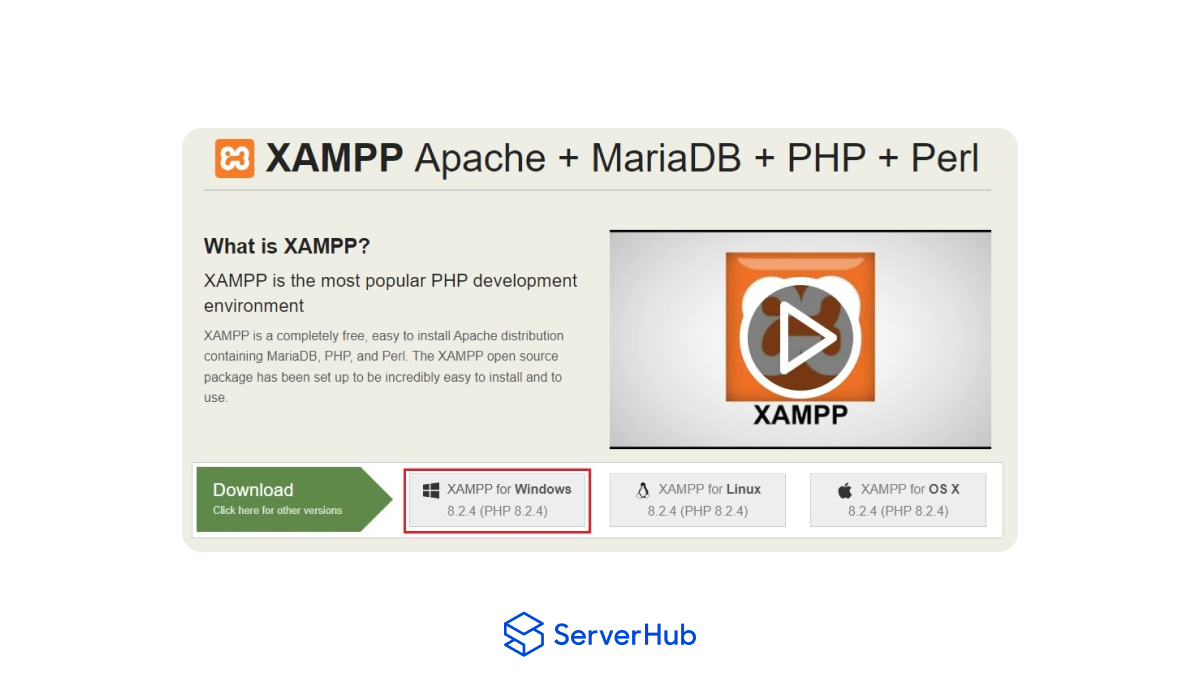
A complete PrestaShop Windows application requires a local web server environment that has the required components to run PrestaShop on your Windows system successfully. One of the most popular free web server environments is XAMMP, which bundles Apache, PHP, MySQL, and the other necessary components. To download and install XAMMP, do the following steps:
1. Go to the Apache Friends website. On this page, click on the “XAMMP for Windows” tab to download the XAMMP version for Windows.
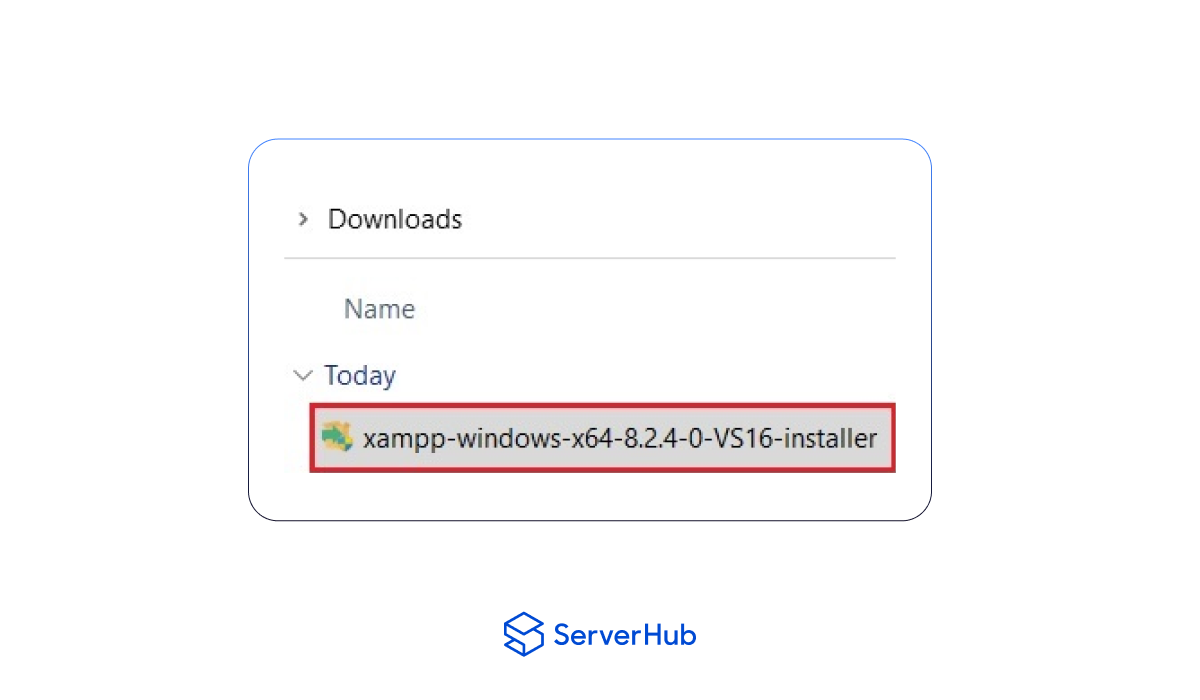
 2. Go to the folder where you downloaded the XAMMP installer file. Double-click on it or right-click to select "Open" to run the installer. Follow the on-screen instructions to set up the local web server environment.
Creating and Setting Up a Database
After XAMMP is installed, create and set up a new database for PrestaShop by doing the following steps:
1. Open the AMMP Control Panel and start the Apache and MySQL modules.
2. Once the Apache and MySQL modules are running, open your web browser and go to http://localhost/phpmyadmin. This will take you to the phpMyAdmin interface.
3. In the phpMyAdmin interface, click on the New button. Enter the required information, including the credentials for the database name, username, and password.
4. Click on the “Test your database connection now” button to test if your database details are correct. If successful, click on the Next button to finish the database setup procedures.
Installing PrestaShop for Windows
1. Go to the folder where you saved the PrestaShop installation files. Make sure to copy the entire installation folder to a folder path inside the XAMMP installation directory that looks like this: C:\xampp\htdocs\prestashop.
2. Open a web browser. Enter the following URL: http://localhost/prestashop. You will be directed to the PrestaShop installation wizard.
3. Select your preferred language and click on Next to proceed. The installer will check if Windows system meets the requirements to successfully install and run PrestaShop. If the system check is fine, click on Next again.
4. Read and accept the PrestaShop Software License Agreement. Then click on Next.
Configuring the Database
To configure the database for PrestaShop to connect to your MySQL server, do the following steps:
1. Open your web browser. Go to http://localhost/phpmyadmin.
2. In the phpMyAdmin interface, enter your database name, username, and password. Enter “localhost” as the database server name and click on Next.
Configuring Your Online Store and Administrator Account
To configure your online store and administrator account details, do the following steps:
1. Fill up all the required information including your shop’s name, main activity, country, and time zone. Click on Next.
2. Enter the necessary administrator account details including your email address and password. Click on Next.
3. After the store and administrator account configuration, PrestaShop will finalize the installation process. Once completed, click on the Admin Panel button to access your store's back office.
Using PrestaShop for Windows
To set up the features in your PrestaShop admin panel, do the following steps:
1. Go to http://localhost/prestashop/admin. Use your administrator account credentials to log in.
2. Once you enter your PrestaShop admin panel, you can manage your store’s features such as customizing the shop layout, adding products or services, configuring payment and shipping options, and setting up other features to efficiently operate and run your online store.
For a comprehensive guide on how to use PrestaShop for Windows, you can visit the PrestaShop Tutorial site for more information.