
MySQL is an open-source relational database management system (RDBMS) that is used for storing, organizing, and retrieving data. In this article, we’ll discuss what MySQL is, and how to download, install, and use it on Ubuntu.
What is MySQL
MySQL is a widely used RDBMS because it provides a robust and scalable solution for various applications. It can be used for data warehousing, web development, data analysis, e-commerce, online transaction processing, and other applications.
MySQL is compatible with many operating systems. However, Linux is the most preferred operating system for MySQL because it offers high performance, stability, security, and compatibility with various software and hardware platforms. In addition, many Linux users would utilize MySQL under the Ubuntu system since it's the most widely used Linux distribution.
How to Download MySQL on Ubuntu
The steps for downloading MySQL on Ubuntu:
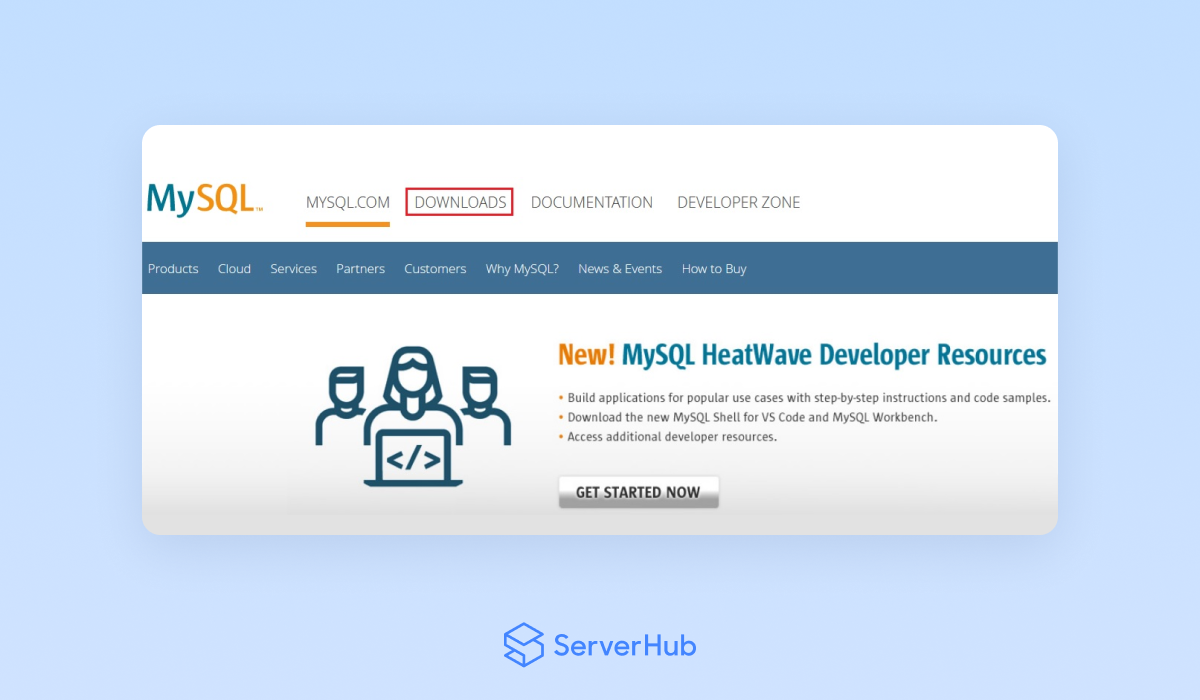
1. Go to the official MySQL website. Click on the Downloads tab.

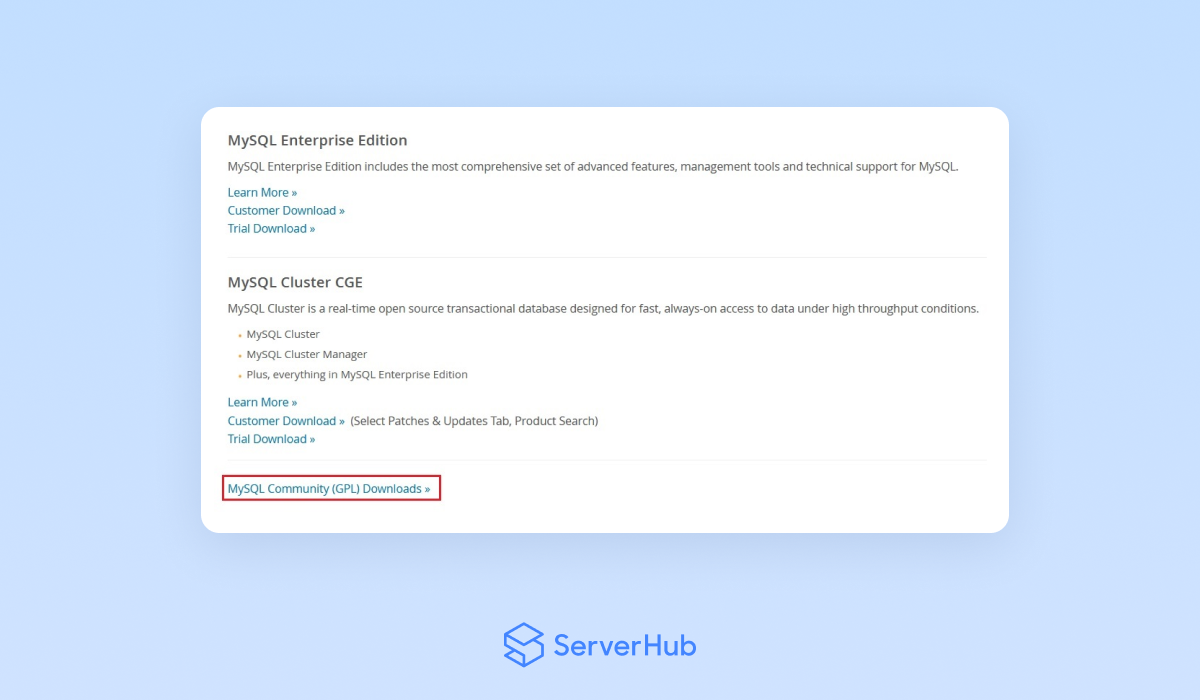
2. On the Downloads page, click on the MySQL Community (GPL) Downloads link.
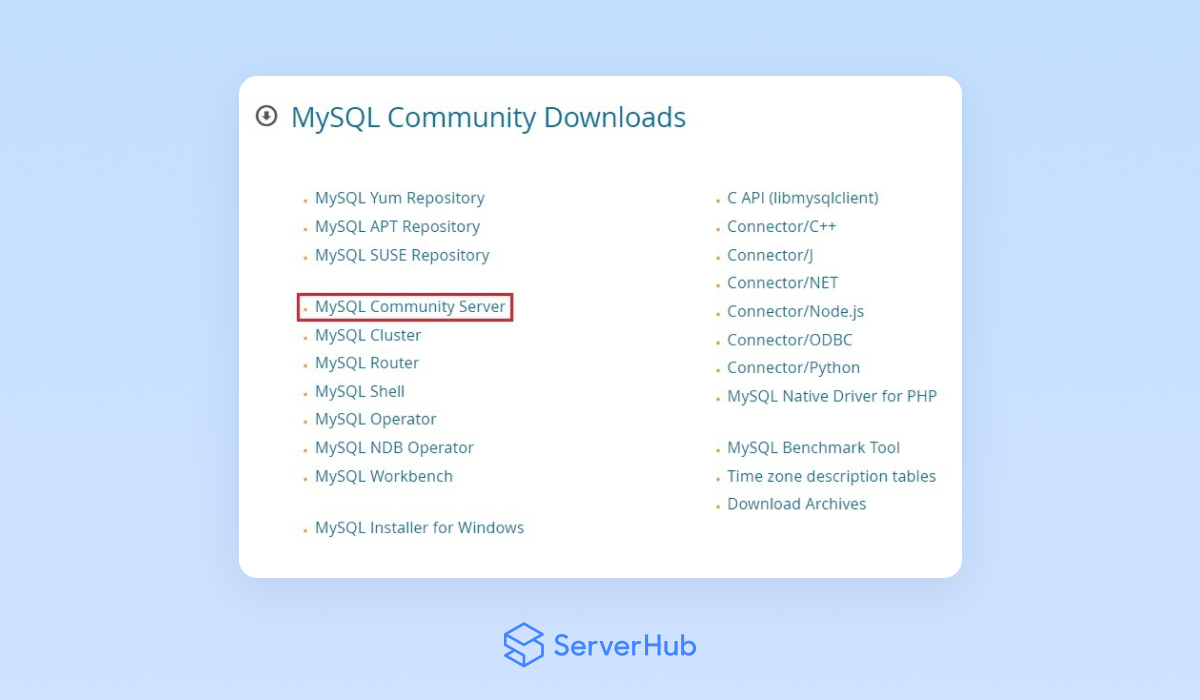
3. On the MySQL Community Downloads page, click on the MySQL Community Server link.
4. On the MySQL Community Server page, select MySQL 8.1.0 Innovation, Ubuntu Linux, and Ubuntu Linux 22.04 versions from the dropdown menus.
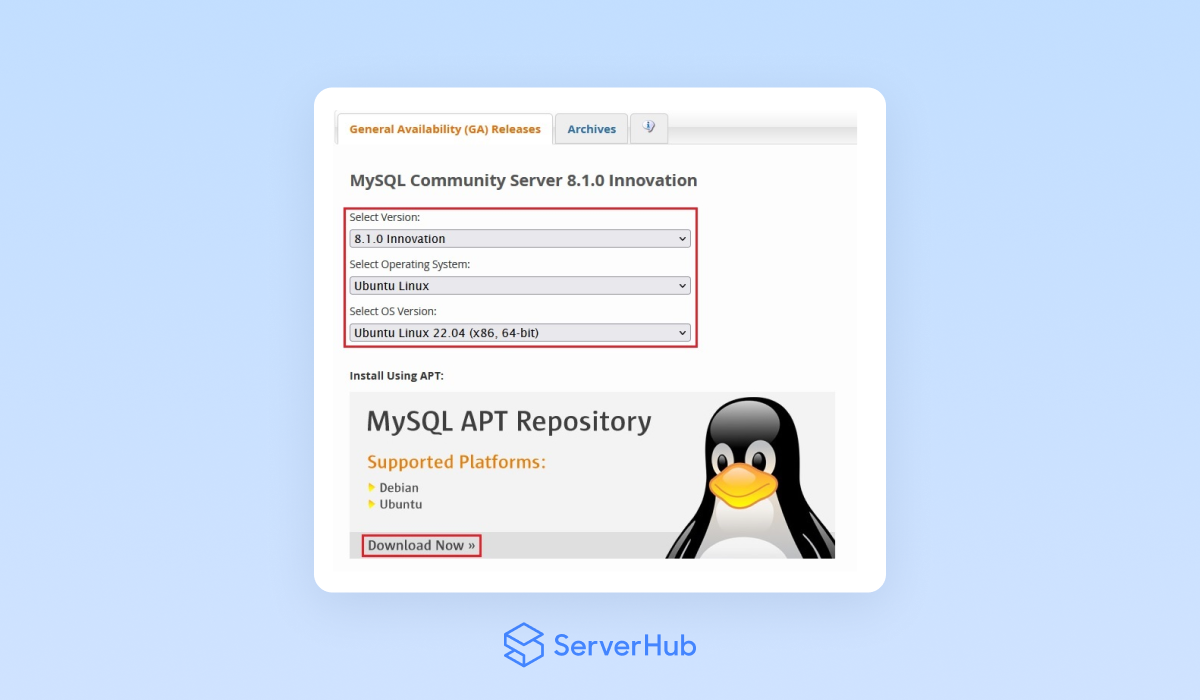 Then click on the Download Now button before the dropdown menus.
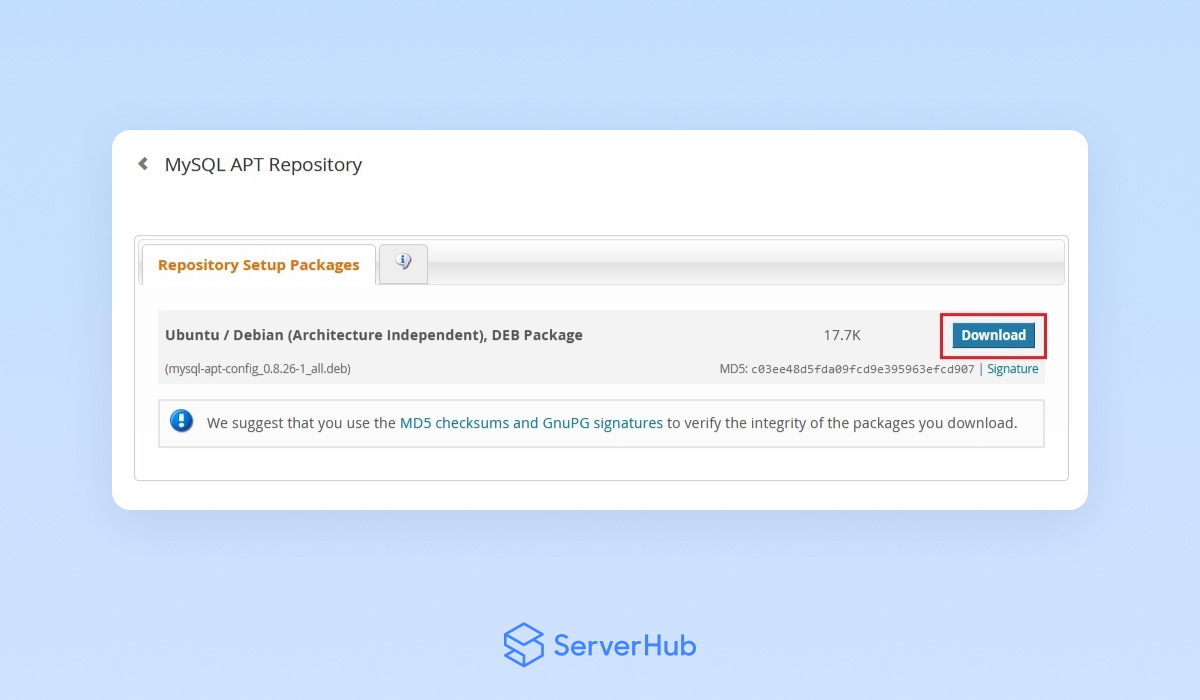
5. In the MySQL APT Repository page, click on the Download button to download the Repository Setup Packages, which contain all the necessary files to install MySQL on Ubuntu.
How to Install MySQL on Ubuntu
Follow these steps to install MySQL on Ubuntu 22.04:
1. Before the installation, you must ensure that your Ubuntu is up to date. On the keyboard, press Ctrl + Alt + Delete to open the terminal. Type the following command:
sudo apt update
2. To install MySQL, enter the following command:
sudo apt install mysql-server
When you are asked to confirm the installation, enter "Y". Then press "Enter".
3. During the installation process, you will be asked to set a password for the MySQL root user. Set your password using this command:
sudo mysql -u root -p
4. A MySQL shell will open. To create a root user account, enter the following command:
CREATE USER 'newuser'@'localhost' IDENTIFIED BY 'password';
Replace ‘newuser’ and ‘password’ with your preferred username and password.
5. Assign the necessary privileges to the new user. For example, the following command grants privileges on all databases:
GRANT ALL PRIVILEGES ON *-* TO 'newuser'@'localhost';
After granting the privileges, apply the changes with the following command:
FLUSH PRIVILEGES;
6. Exit the MySQL shell by entering the following command:
EXIT;
7. As part of the configuration process, it’s recommended to run the MySQL secure installation script. Execute the following command:
sudo mysql_secure_installation
This script will prompt you to validate the password for the MySQL root user, remove anonymous users, disallow root login remotely, remove the test database, and reload the privilege tables. During the configuration, follow all the on-screen prompts to secure your MySQL installation.
How to Install MySQL Workbench on Ubuntu
MySQL Workbench is a visual database design tool for designing and developing databases. Although MySQL Workbench is optional for MySQL users, this tool can provide you with a user-friendly interface for designing database schemas, writing SQL queries, and managing database connections.
Downloading MySQL Workbench:
1. Go to the official MySQL website. Click on the Downloads tab.
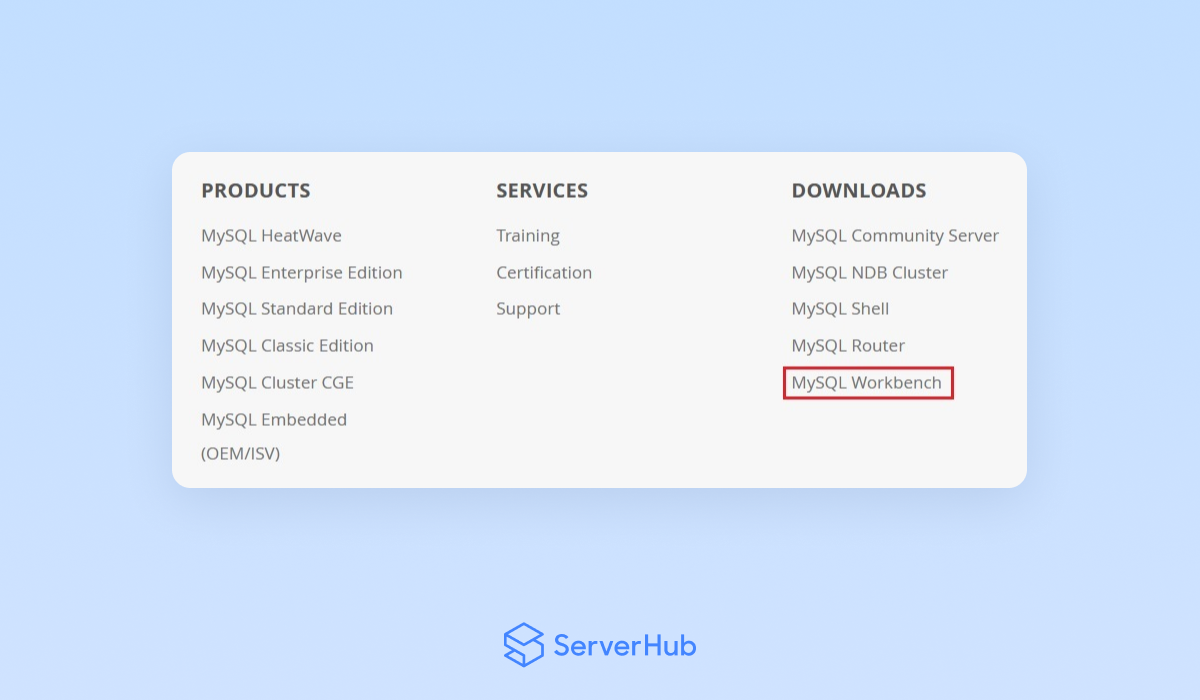
2. On the Downloads page, go to the DOWNLOADS section at the bottom of the page. Click on the MySQL Workbench.
3. In the MySQL Workbench page, select the Ubuntu Linux OS and Ubuntu Linux 22.04 OS versions from the dropdown menus.

In the DEB Package section, select the DEB Package that is relevant for your system and click on its Download button.
4. Go to the directory where the downloaded MySQL Workbench Package is located. For example, if the package is in the Downloads directory, use the following command:
cd ~/Downloads
Installing MySQL Workbench
1. To install the MySQL Workbench package, run the following command:
sudo dpkg -i mysql-workbench-* .deb
2. If there are any missing dependencies in the pagckage, use the following command:
sudo apt --fix broken install
Configuring MySQL Workbench
After the installation is complete, you need to configure the MySQL Workbench to connect to your MySQL server. Do the following steps:
1. Launch MySQL Workbench from the applications menu, or run the “mysql-workbench” in the terminal.
2. Upon the first launch of the MySQL Workbench, you will be prompted to set up a connection to the MySQL server. Click the '+' icon next to the “MySQL Connections”.
3. Set up a name for your connection in the "Connection Name" field.
4. Under the "Connection" tab, enter the following details:
- Hostname: localhost
- Port: (usually "3306)
- Username: your MySQL username (usually "root")
- Password: your MySQL password
5. To check if the connection is successful, click on the "Test Connection". Then click on "OK".
6. Once the connection is successful, you can start using MySQL Workbench. For more information on how to use MySQL Workbench, visit the How to Use MySQL Workbench on Ubuntu 22.04 page.
How to Use MySQL on Ubuntu
Follow these steps for using MySQL on Ubuntu:
1. You can start using MySQL by accessing its command-line interface. Use the following command:
mysql -u root -p
This command will prompt you to enter your root user account password and then connect you to the MySQL shell. From there, you can enter SQL commands and queries and do other related tasks.
2. For more information on how to use MySQL on Ubuntu, you can visit the MySQL Server on Ubuntu 22.04 tutorial.